Pages

Wednesday, December 5, 2012

Cinnamon Buns

Hi There,
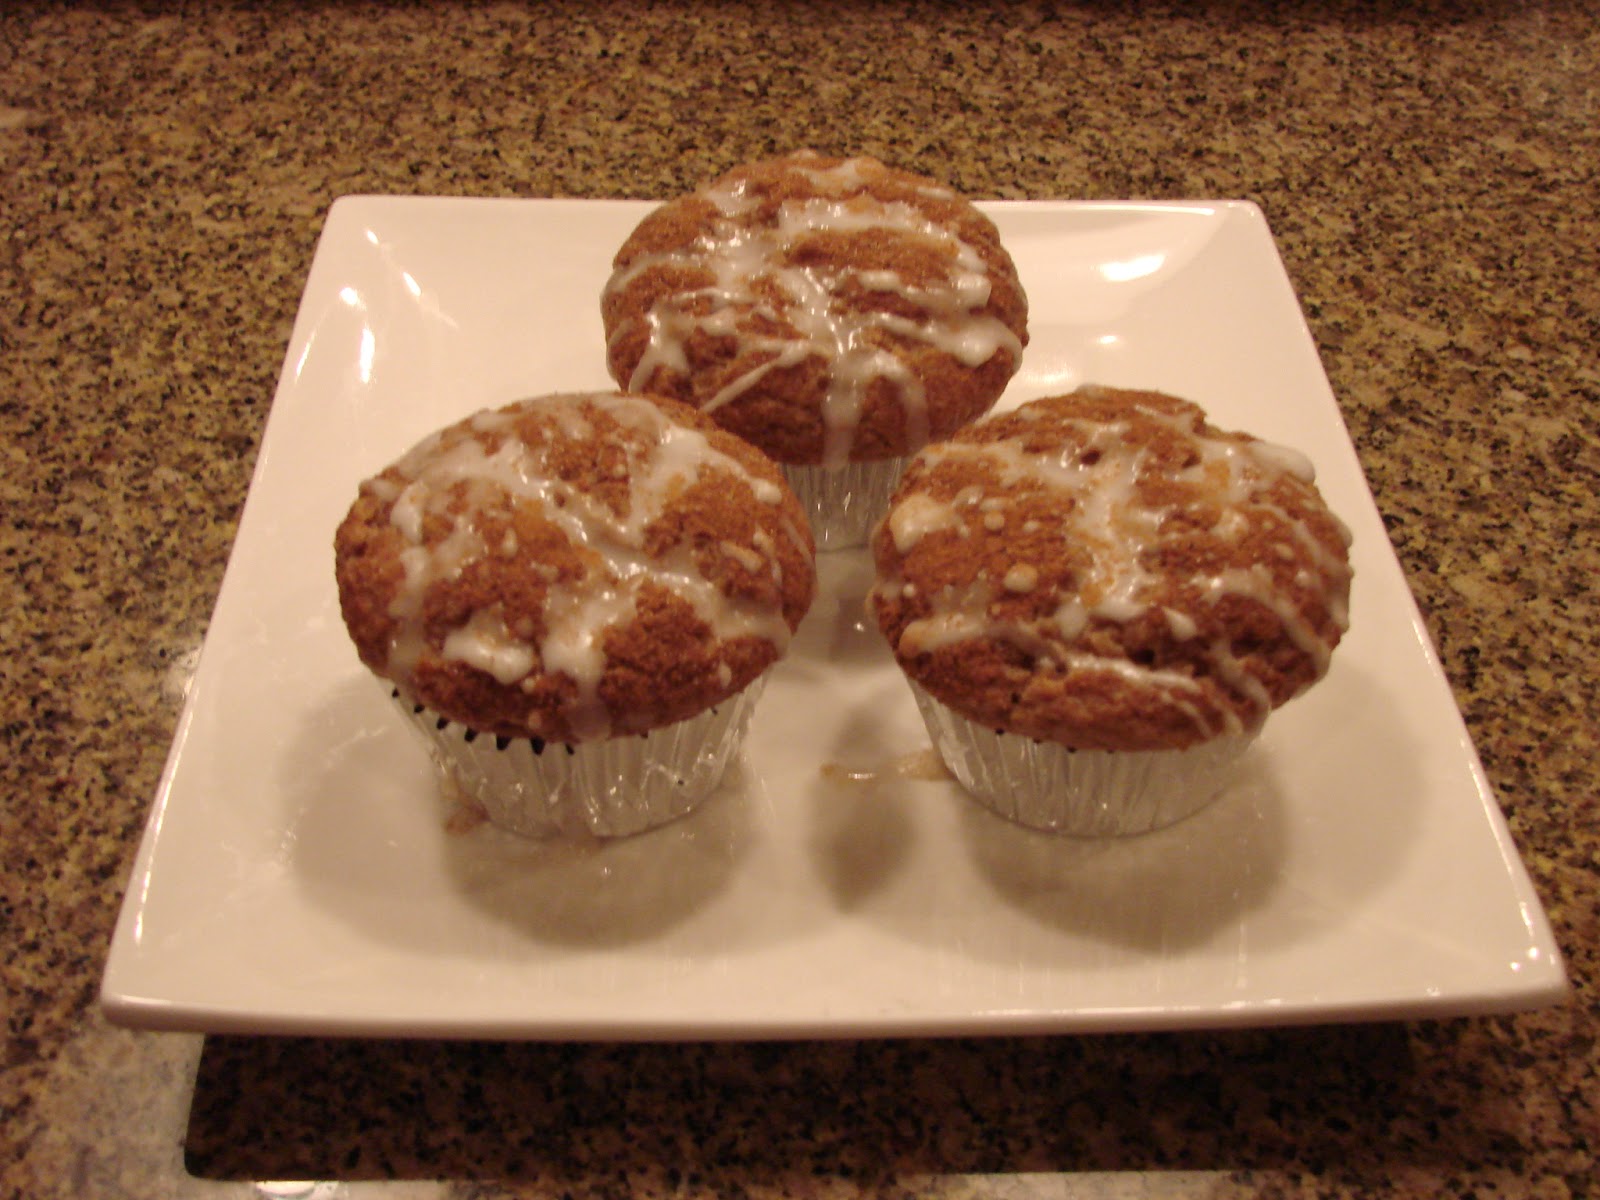
As I mentioned in my last post, I'm in love with all things cinnamon so this recipe shouldn't surprise you.  Do you love the franchise Cinnabon as much as I do?  If yes, then this is the recipe for you.  It's as close to the mall-buns as I've ever tasted.  I sure hope you try this one.  I'm actually thinking about giving some of these as Christmas presents.  Please, please let me know if you try them.  I'd love to hear what you think of them.

For the dough:
1 cup whole milk
1 packet active dry yeast - 1/4 ounce
1/4 cup sugar and 1/4 teaspoon sugar
4 tablespoons butter - melted
1 large egg yolk
1 1/2 teaspoons vanilla extract
2 3/4 cups flour
3/4 teaspoon salt
1/2 teaspoon grated nutmeg

For the filling:
1 stick butter - very soft
1/2 cup sugar
3 tablespoons cinnamon

For the glaze:
2 cups confectioners sugar - sifted
1/3 cup heavy cream
4 tablespoons butter - melted

Warm the milk in a saucepan until it reaches about 100 degrees.  (Don't over heat or it will kill the yeast.)
Remove from heat and sprinkle package of yeast and 1/4 teaspoon on top of milk.  Do not stir.  Cover and let sit for 5 minutes until foamy.  Whisk in butter, yolk and vanilla.

Whisk together the flour, 1/4 cup of sugar, salt and nutmeg into the bowl of a mixer.  Make a well and add the yeast mixture to the center.  Using a dough hook, knead the dough on low until it gathers around the hook, about 5 minutes.  If the dough is too sticky, add up to 2 tablespoons of flour. 

Remove the dough and shape into a ball.  Spread some butter in a bowl and place the dough in the bowl to rise for 1 hour 15 minutes. 

Roll the dough on a lightly floured surface into a rectangle about 12 X 14 inches.  Mix together the cinnamon and sugar for the filling.  Spread the butter on top of the dough leaving about 1/2 inch toward the top of the rectangle.  Sprinkle all of the cinnamon/sugar onto the butter.  On the 1/2 inch that is still exposed, spread a bit of water. 

Starting nearest you, roll the dough up and seal at the watered end.  Cut the rolls about 1 1/2 inches thick.  Place them in a buttered 13 x 9 pan, cut side down.  Cover and let rise for 40 minutes. 

Preheat oven to 325 degrees and bake for 30 to 35 minutes until golden brown.  Make the glaze and after rolls have cooled to warm, spread the glaze on top. 

These rolls are best eaten warm but are still delicious at any temperature!!! 

Enjoy!!!
Love,
Beth

Friday, November 30, 2012

Spice Muffins

Hi There,
I love this time of year.  Not just because the Christmas holiday season has everyone hustling around, but because its dark when I get home from work and I don't feel the "need" to do anything but cook dinner and curl up in my favorite blue chair in front of the fire.  This is my nightly routine and it stirs up memories of cookies baking and the smell of the "warm" spices that I love so much.  My "warm" spices are cinnamon, ginger, cloves, nutmeg and allspice.  These define the winter months to me.  I'm basically addicted to cinnamon.  Anything that has this wonderful spice in it, I love.  I use it as often as possible. 
My friend Donna told me about a Facebook page called The Alchemist.  It shares many wonderful recipes.  When I saw this recipe, I knew immediately that I had to try it.  I think these muffins are pretty close to perfection.  I hope you do too!

Spice Muffins:
2 cups flour
1 cup brown sugar
1 tablespoon baking powder
1/2 teaspoon baking soda
1/2 teaspoon salt
2 1/2 teaspoons cinnamon
3/4 teaspoon allspice
1/4 teaspoon cloves
1 1/2 teaspoon ginger
1/2 teaspoon nutmeg

2 large eggs
1 1/4 cup sour cream
1/3 cup vegetable oil
1/4 cup applesauce
2 teaspoons vanilla

Topping:
cinnamon sugar
confectioners sugar
water


This recipe makes about 12 muffins. 
Preheat the oven to 375 degrees.  Spray a muffin tin or use paper muffin cups. 

In a large bowl, whisk together all the dry ingredients and set aside.  In a smaller bowl, whisk together the wet ingredients.  Pour the wet into the dry and stir.  Fold gently, just enough to mix.  Do not over mix or muffins will be tough.  Scoop the mixture into the muffin pan (I use an ice cream scoop).  Sprinkle each muffin with cinnamon sugar.  Bake for 18 to 20 minutes until toothpick comes out clean. 

While muffins are baking, mix a small amount of conf sugar with water.  After the muffins have cooked, drizzle this mixture over top. 


I hope you enjoy these muffins with a nice cup of coffee in front of your fire!!

Love,
Beth


Saturday, October 13, 2012

Butternut Squash and Apple Soup

Hi There,
I love this time of year.  Not only because God uses His paintbrush to create beautiful colors, but because it's the best time of year for food!!  Don't get me wrong, I was just as sad as everyone to see summer go......... however, nothing makes me forget summer faster than the smell of dried leaves and apples!  It brings me right to the kitchen where I instantly think about comfort food.  Soup, roasts, pies, - anything that takes a long time to cook and fills my house with an aroma that brings me right back to my mother's kitchen. 
Soup to me is the classic comfort food.  It feels good to cook, good to smell and good to eat.  Here is the soup that I usually start the season off with.  Butternut squash, with it's creamy texture, is on the top of my soup list. 
I forgot to take a picture before we ate it for dinner last night.  So sorry........... but you can envision a beautiful pumpkin colored soup that is like velvet to stir...................

2 tablespoons butter
2 tablespoons oil
1 butternut squash - peeled and cut into cubes
2 medium sized onions - chopped
2 carrots - peeled and cut into 1 inch pieces
3 apples - peeled and cut into 1 inch pieces
salt and pepper
2 - 26 oz containers of chicken stock (I use Swanson)
pinch of cinnamon
pinch of dried thyme
2 more tablespoons butter

In a large pot, heat butter and oil.  Add onion and carrots and saute for 5 minutes.  Add squash.  Cook for another 5 minutes.   Add apples, and all remaining ingredients except the last 2 T of butter.  Cook until all vegetables are soft.   Turn off the heat and let the soup sit for about 1/2 hour.  If you have an immersion blender, use it to puree the soup.  If not, then use your blender, smoothing the soup in batches.  Be careful - hot liquid expands so don't fill the blender to the top. 

Return all pureed soup back to pot and reheat slowly.  Add the last two T of butter and melt right before serving. 

This recipe makes enough for you to eat and still have some to freeze. 

Enjoy!!
Love,
Beth

Wednesday, September 19, 2012

Is September almost over yet????

Hi There
Most of you know that September is a difficult month for me.  My stress level is very high and my patience level is very low.  Unfortunately I don't have the time or the energy to spend any time in the kitchen, doing my favorite thing - cooking.  I sure am hoping that October will be better and that I'll be able to share lots of new recipes with you.  So on that note, I really don't have much to share today other than a tip.  Here it is:

Are you a mushroom lover?  Do you like sauteed mushrooms over your steak or as a side dish to almost anything?  Well here is a trick - when you saute your mushrooms, don't salt them until they are completely cooked.  Put some butter and evoo in a pan, with a little pepper, and saute until browned.  If you do it this way, they will remain soft and juicy.  If you add the salt before they are cooked, it will deplete all the moisture in the mushroom and they will become tough and dry. 

That's all I have for today.  Please pray for my sanity!!! 

Enjoy!

Love,
Beth

Monday, August 20, 2012

Peach Crisp

Hi There,
This is a great time of year for fruit desserts.  Peaches are nice and ripe, usually from local farms.  I try very hard to maximize the bounty of the season.  Today I bought some wonderful peaches at a farm stand.  Some I saved to eat with my lunch but others I used for a delicious Peach Crisp. 

1/2 cup flour
1/2 cup quick oats
1/2 cup firmly packed light brown sugar
1/2 tsp cinnamon
1/2 tsp nutmeg (if you aren't a fan of nutmeg, omit it and double the cinnamon)
1/4 tsp salt
4 tablespoons melted butter
5 to 6 whole, ripe peaches - peeled and cut into large chunks
1/2 fresh lemon

In a bowl combine all the dry ingredients.  Add the melted butter to make a crumbly mixture. 
Squeeze the lemon and toss the juice over the peaches.  Put peaches into 8 or 9 inch square pan and cover loosely with the dry mixture.  Cover with tin foil and bake at 350 degrees for 20 minutes.  Remove the foil and bake for an additional 20 minutes. 

Serve warm with ice cream.  Don't let this dessert sit for too long.  It can begin to get watery.


Enjoy!
Love,
Beth

P.S. My grandson Caleb thinks this looks very gross.  But it really does taste good!!

Sunday, August 19, 2012

Chicken Cutlets

Hi There,
This past Friday I cooked chicken cutlets.  My family likes them the easy, simple way, which a restaurant would call Chicken Milanese (my family is from the Milan area of Italy).  Milanese is anything that is cooked with a lemon/garlic sauce.  Very simple ingredients, very simple flavors, but oh so yummy. 
Today I had left over chicken cutlets.  I wanted to have them for dinner, but how should I serve them?  I didn't want to eat them the same way we ate them on Friday.  So I looked around the fridge and pulled out a container of fresh baby spinach, half of a hunk of fresh mozzarella and a tomato.  What could I do with these for a simple, clean dinner.  Here is what I decided:

I took the spinach and sauteed it for about 2 minutes in a bit of olive oil and 2 cloves of garlic.  I put the cutlets in a baking dish, and places a small amount of the mozz on top of each cutlet.  I cut up the tomato into chucks and added that too.  Then the spinach, garlic and all the juice over the top of everything.  I sprinkled a bit of chicken broth in the pan and placed it in the oven at 350 degrees for 30 minutes. 


This is such and easy meal and it was soooo good!!.  You could even buy already cooked chicken cutlets at the local meat market.  You will have an "almost homemade" dinner that will taste like you were in the kitchen for hours. 

Enjoy!!
Love,
Beth

Wednesday, August 15, 2012

Eggplant Donut Holes

Hi
I'm sure the title sounds silly, but believe me, these are delish!!!  This is another recipe for this time of year where you can use the bounty from your garden (or the local fresh market), in different ways other than the same old recipes your family is used to.  This one is fun and really good.  Let me know what you think.  So many of you responded to the Zucchini Bread recipe and I thank you for that.  I really want to know what you think of my ideas!!

This recipe was created because I remember seeing something similar on TV.  I couldn't remember all the ingredients so I just opened my fridge and used what I had.  Here is what I did:

1 large eggplant - cut the eggplant in half, lengthwise.  Score it with a paring knife into cubes but keep the cubes in the skin.  Sprinkle with a bit of salt, pepper and olive oil.  Bake at 400 degrees for about 40 or 45 minutes.  Let it cool. 

Scoop out the inside of the eggplant into a bowl.  Add 3/4 cup grated Parmesan, 1/2 flavored bread crumbs, 1/4 store bought pesto, 1 egg beaten, 1/2 tsp garlic powder and 2 tablespoons chopped flat leaf parsley.  Mix together.  If the mixture is very wet, add a bit more bread crumbs. 

Heat some vegetable oil in a pan (I use cast iron) and using a small cookie scoop (or anything round) scoop the mixture into the hot oil and fry for 3 or 4 minutes per side.  Remove them from the oil and drain onto a paper towel.  Serve with tomato sauce and Parmesan cheese.  If you want this recipe to have a kick to it you can add some red pepper flakes to the sauce. 


I'm using these tonight as a first course for dinner - I have a friend coming over and I thought it would be nice to serve something different.  Please let me know if you give this a try!

Enjoy,
Love
Beth

Friday, August 10, 2012

Zucchini Bread

Hi There,
In keeping with my theme "all things zucchini" this month, today I'm sharing zucchini bread.  Now to some people bread sounds dull and boring.  I assure you this is not dull and boring bread.  It is sweet and moist.  Wonderful for breakfast with a bit of cream cheese or a late night snack.  My family was recently on vacation in Lake Placid, NY.  I brought two loaves of this bread to share.  It was devoured moments after it was served. 
This recipe makes two loaves.  When I make it I leave one out for us to eat and put the other in the freezer.  Nothing is better on a cold winter's day than to have a wonderful loaf of sweet summer bread with a cup of tea.

Zucchini Bread:

3 1/4 cups flour
1 1/2 teaspoons salt
1 teaspoon nutmeg
2 teaspoons baking soda
1 teaspoon cinnamon
3 cups sugar
1 cup vegetable oil
4 eggs, beaten
1/3 cup water
2 cups zucchini, grated
1 teaspoon fresh lemon juice
1 cup chopped walnuts

Preheat the oven to 350 degrees.  Grate the zucchini in a food processor or with a box grater.  Place the zucchini in a strainer in the sink and let it sit.  In a bowl combine the flour, salt, nutmeg, baking soda, cinnamon and sugar.  In another bowl combine the oil, eggs, water, and lemon juice.  Squeeze the zucchini in the strainer as much as you can to get out all the moisture.  Add the zucchini to the wet mixture.  Add the wet mixture into the dry ingredients and stir.  Don't over mix.  Fold in nuts. 
Spray two loaf pans with nonstick spray.  Add half the mixture to each pan.  Bake for 1 hour or until tester comes out clean. 
After it's cooled, sprinkle with a little bit of powdered sugar and serve. 

Enjoy!!
Love,
Beth


Thursday, August 2, 2012

Zucchini Fritters

As I mentioned in my previous post, now is the time for all things zucchini.  It's abundant in gardens and at farm markets.  It's also rather inexpensive at this time of year, so take advantage of a good, delicious deal!!!
This recipe is easy to make and tastes wonderful.  Even the kids will love it and they don't need to know what they're eating.  My family eats them as I'm frying them.  It's hard to have any left to serve!!

Grate 2 small zucchini or one large one.  You can manually grate them or use your food processor.  Place the grated zucchini into a colander in the sink.  Toss in 2 teaspoons of salt.  Let it sit for about 10 to 15 minutes.  The salt will extract some of the liquid in the squash.  After it sits, squeeze out as much liquid as you can and place the zucchini in a bowl.  Mix in 1 small onion that has been chopped finely (I used 1/2 of a large vadallia onion), 1/4 cup chopped fresh Italian parsley, 3/4 cup grated parmesan, 1/4 cup flour, 1 beaten egg.  Mix together until combine.  Do not over mix.  Heat oil in a pan and place one spoonful of mixture into pan.  Flatten with back of spoon.  Fry just one fritter, let it cool and then taste it.  Does it need more salt?  If so, then add a small amount to the mixture.  Fry each fritter for 3 to 4 minutes on each side.  Drain on a paper towel and sprinkle with parmesan. 


Enjoy!!
Love,
Beth

Friday, July 6, 2012

Zucchini Blossoms

Hi
Some of you may be familiar with eating squash flowers and others may think I've lost my mind.  Believe me, they're delicious.  They are a real treat and the reason I plant zucchini in my garden!!  Yes, I love the squash, but the real delight is when I can pick the flowers and fry them.  It brings me right back to my grandmother's kitchen when I was a child.  I go back there a lot in my mind............

You can pick your own flowers or you can buy them at an Italian food store.  I've bought them at Liuzzi's Market and the Natural Food Market, both in North Haven and both worth the trip.   Whether you pick or buy them, make sure you wash them when you get ready to use them.  They will last, uncooked, up to a week in the refrigerator if you wrap them in a wet paper towel.  When ready to fry, wash them and remove any large stamen.  Little ants LOVE these flowers as much as we do so make sure they're cleaned well.  Place them on a paper towel and let them air dry. 


This is one of those recipes that you need to determine the amount of ingredients based on how many flowers you are frying.  For the amount above I used the following:

2 eggs
1/2 cup whole milk
1/2 cup Parmesan cheese
1 cup flour
1 teaspoon salt 
1/2 teaspoon pepper

In a bowl, mix together the egg, milk and cheese.  Stir - mixture should be a bit thick but you should still be able to dip flowers into mixture. 

In a plastic bag mix flour, salt and pepper.  Heat a frying pan and put enough oil in it to cover the bottom.  Put a few flowers in the bag and shake so that flowers are covered with flour mixture.  Remove and dip into
egg mixture.  Cover completely with egg mixture and fry for about 3 to 4 minutes on each side until lightly brown.  Repeat steps until all flowers are cooked.  Place the cooked flowers on a paper towel to remove excess oil.  When ready to serve sprinkle with a small amount of Parmesan cheese. 

** a tip - I usually fry one first.  Let it cool and taste it to make sure everything is seasoned properly. 


Don't they look yummy!!!  I hope you try this recipe.  It's really easy once you get the flowers.  Finding them is probably the hardest part. 

Enjoy!!
Love,
Beth


Friday, June 29, 2012

Sweet Onion Pizza

Hi There
I'm back from traveling to Russia and Tennessee and I'm glad to be back in my kitchen.  There's something very comforting to me about creating food for my family to enjoy.  Cooking is my therapy.  It relaxes me and pulls me away from all the problems of this world. 
Today's post is a very easy, but wonderfully delicious pizza.  We can even cheat and use store bought pizza crust.  If you try this, I guarantee it will be one of your "go to" recipes for company or a quick weeknight meal. 

1 Boboli store bought thin pizza crust
1 tablespoon butter (more if your not concerned about butter intake!)
2 large onions, sliced
salt and pepper
1/4 teaspoon chopped fresh rosemary (optional)
2 level tablespoons brown sugar
Shredded mozzarella (as much as you like)


Heat your oven to 375 degrees.  In a saute pan, melt the butter.  Add the sliced onions, salt and pepper to taste.  Saute the onions until soft.  No need to carmalize them.  Add the rosemary and saute another 3 to 4 minutes.  Turn off the heat and add the brown sugar. Stir until the sugar melts.  With a slotted spoon, remove the onions from the pan and place on top of the pizza crust.  Top with mozzarella and bake directly on the grate of the oven.  This will allow the crust to crisp on the bottom also.  Bake for about 20 minutes but watch to make sure the mozzarella doesn't brown too much.  Each oven is different, so yours may require less time.  The picture below is what mine looked like the last time I made it.  I think I left it in the oven a few minutes too long.  I like the cheese a bit less brown.  But, it still tasted delicious.  I really hope you try this one.  I promise it won't disappoint!!


Enjoy!!
Love,
Beth

Saturday, June 16, 2012

No Russian recipes

Hi
I spend the past two weeks in Russia.  It was a wonderful experience.  People were friendly and Moscow is a very impressive city.  Prior to leaving I was hoping that I'd have some really neat Russian recipes to share with you when I returned.  Well, that didn't happen.  The one thing I wasn't impressed with was the food.  Russian's eat a lot of meat, and I'm not a meat lover.  They also eat a lot of fish, which I like, but I like to identify it prior to eating it!!  Needless to say, I wasn't very daring when I was choosing my meals.  I stuff with the "American" food on the menu. 

So I'm home and ready to start cooking farmiliar food once again.  Stay tuned.  I'll post some new recipes this week.

Love,
Beth

Wednesday, May 23, 2012

Tiny Tips

Hi There,
I'm writing this blog post as my last for a few weeks.  On Saturday, I head to Russia for several weeks, so I decided to leave you with some tips I've learned over the years.  Some I'm sure you've heard before and others you probably haven't.  I hope you use some, if not all of these.  I find them really helpful!!

Tip 1 - a hunk of parmesan cheese should always be wrapped in wax paper, not plastic wrap.  The wax paper allows the cheese to breathe.  The plastic wrap causes moisture to stay locked inside, causing condensation and then mold. 

Tip 2 - I use a lot of garlic but I know that some people don't use very much.  Sometimes when you have a head of garlic at home that hasn't been used quickly enough, a bright green stem forms in the middle of the clove.  This DOES NOT mean the garlic is bad.  The only thing you have to do is remove the green stem and use the garlic as normal.  The green stem is edible, but it can be bitter so best to remove it. 

Tip 3 - If you are making meatballs or meatloaf, it can be difficult to tell if your mixture is seasoned correctly.  Too often cooks find out after everything is cooked that it could have used a bit more salt or seasoning.  A trick I've used for the past several years is this - take a small bit of the mixture and cook it in a frying pan on top of the stove.  You can then eat it and check for seasoning. 

Tip 4 - Please do not put oil in your pasta water.  If the water is boiling and you stir the pasta, it should never stick together.  The oil will make your pasta slippery and the sauce will not stick to it.  

Tip 5 - Making your own vinaigrette is so much better for you than bottled dressing and it's very easy.  Simple ingredients make a great dressing - salt, pepper, garlic powder, red wine vinegar and whisk in some evoo.  You can even put these ingredients in a jar and shake if you'd rather not whisk. 

Enjoy!!
Love
Beth

Saturday, May 12, 2012

Faux Corn on the Cob

Summer is a special time for all of us.  Most of us have wonderful childhood memories of special summer fun.  My childhood was no different.  My memories include large family picnics where food and fun were the main themes.  Fresh food was always best.  Our family dishes always revolved around the food that could come from our gardens.  Each picnic always had to have corn on the cob.  I remember shucking the corn as a child, anticipating that buttery taste in my mouth.  My love of corn on the cob has only grown stronger as I grow older.  Only now I've found a better way to eat it, keeping the wonderful buttery taste but not the mess.  Not to mention that there are some older people in our family that can't bite the corn off the cob.  This recipe gives them the joy of this special summer flavor without damaging their dental work!!!!

Faux Corn on the Cob:

12 ears of fresh picked summer corn
butter
evoo (extra virgin olive oil)
salt
pepper
1/4 cup chopped Italian parsley

Bring a pot of water to a boil. 
Add one tablespoon of salt. 
Place the corn into the boiling water and cook until corn is tender, about 5 minutes. 
Remove corn from water, place on a dish and let it cool. 
Using a sharp knife or a special tool that is available in stores, remove the corn from the cob. 
At this point you can either place the corn in a freezer bag and freeze or continue with recipe.
Place the corn in a pan. 
Add butter - you can use as much as you like.  I use about two tablespoons.
Add one tablespoon evoo.
salt and pepper to taste. 
Stir over low heat until butter is melted. 
Remove from heat and add parsley. 
Serve immediately. 


The freshness of the corn and the parsley are a great combination.  It allows you the wonderful, sweet flavor of the corn and the brightness of the parsley.  It is also less caloric that rolling an ear of corn in a sick of butter!!

Enjoy!!
Love,
Beth

Thursday, May 3, 2012

Vanilla Cinnamon Scones

What the heck is a scone anyway?  I don't really know but when I think about them I always have though of a dry, bland pastry.  Well I certainly surprised myself with this one!  These are great.  If you love the flavors of vanilla and cinnamon, this recipe is for you!!

Vanilla - Cinnamon Scones:

2 cups flour
1/3 cup sugar
1 tablespoon baking powder
2 teaspoons cinnamon
1/4 teaspoon salt
1/2 cold butter (one stick)
1 egg - whisked
1 teaspoon vanilla extract
1/4 to 1/2 cup buttermilk

Frosting:

2 cups confectioners sugar
1 vanilla bean - cut in half and seed inside scraped out
1/2 teaspoon cinnamon

Preheat the oven to 450 degrees.
Put dry ingredients into a large bowl (flour, sugar, baking powder, cinnamon, salt)
Put butter in bowl with dry ingredients and blend with a pastry cutter or two forks until mixture resembles
      course cornmeal.
Add egg and vanilla extract - do not mix yet.
With minimal stirring, mix in just enough buttermilk to pull the dough together.  It will be crumbly.
Turn out onto floured surface and knead slightly.
Gently pat down in a disc about one inch thick.
Cut into 6 or 8 wedges, depending on how big you want them.
Transfer to a buttered baking sheet and bake for 15 to 20 minutes.  Cool on the baking sheet. 

After the scones have cooled, mix together all the frosting ingredients.  Slowly add water, one teaspoon at a time until it reached your desired consistency.   Pour over cooled scones. 


Enjoy!!!

Love,
Beth


Friday, April 27, 2012

Pesto Pasta

This recipe tastes good and its easy!  What more could we ask for.  It gives you a creamy texture without any heavy cream.  It's one of my go-to recipes when I can't think of anything else to make for dinner or if I forgot to take something out of the freezer. 

Pesto Pasta:

8 oz pasta (I use angel hair)
1 cup milk
3 heaping tablespoons pesto (I use store bought but if your ambitious, make your own)
1/2 teaspoon salt
1/4 teaspoon freshly ground pepper
1 tablespoon evoo (extra virgin olive oil)
1 tablespoon flour
1/2 cup grated parmesan cheese
2 tablespoons mascarpone cheese (I call this Italian cream cheese only it's lighter)

Cook the pasta until it's al dente. 
While the pasta is cooking, combine the mild, pesto, salt and pepper and set aside.
In a saucepan, heat the evoo and sprinkle the flour over it.  Whisk together and cook for 2 minutes.
Slowly add the milk/pesto mixture and cook for a few minutes to thicken, stirring constantly.
Remove the sauce from the heat and add the cheeses. 
Drain the pasta reserving about 1 cup of the cooking water. 
Toss the sauce and the pasta together.  If the pasta and sauce seems too thick for your liking, then add some of the pasta water, one tablespoon at a time until it reaches your desired consistancy. 


I know some people shy away from pesto because it has a strong flavor.  In this recipe, the pesto does not overpower the dish.  It gives the pasta a fresh, subtle flavor. 

Enjoy!!!
Love,
Beth

Tuesday, April 24, 2012

Southern Buttermilk Biscuits

When most people think of the south they think of the smoky flavor of barbeque.  Some go in search of the very best, trying every pulled pork and brisket in town.   When I think of the south I think biscuits.  I LOVE them.  The very best I have tasted is at the Loveless Cafe in Nashville, where they are famous for melt in your mouth buttery biscuits.  I know I'll never be able to get close to making biscuits this good, but I tried, for the very first time, to bake them.  They were pretty good!  Brad and I enjoyed them a lot, although we both know they will never take the place of our favorite Nashville cafe!!

Buttermilk Biscuits:

2 cups flour
1 tablespoon sugar
1 teaspoon salt
2 teaspoons baking powder
1/2 teaspoon baking soda
1/2 cup chilled vegetable shortening
3/4 cup buttermilk
3 tablespoons butter, melted

Combine dry ingredients in a bowl.  Add shortening and using a pastry cutter blend until mixture looks like course crumbs.  Add buttermilk to center of dry ingredients and fold together.  Dough will be sticky.


Turn the dough out onto a floured board and fold over 3 or 4 times making layers.  Roll dough to 3/4 inch think.  Using a biscuit cutter or glass, cut biscuits into rounds.  Transfer to baking sheet, preferably non stick.  Brush the top of each biscuit with melted butter and bake at 400 degrees for 13 to 15 minutes until golden brown.  


I think next time I'll make them a bit thicker.  I like my biscuits thick.    Enjoy!!

Love,
Beth

Monday, April 23, 2012

Artichokes

I think one of God's most perfect foods is the artichoke.  I love the taste, color and texture of them and they're so much fun to eat!  Some in my house disagree, namely my husband, who thinks that eating food shouldn't require so much work.  He feels the same way about lobster.  I on the other hand feel that something that tastes so good is very much worth all the work!! 

Here is one of my recipes:

Stuffed Artichokes

2 large raw artichokes
1 1/2 cup italian flavored bread crumbs
3 garlic cloves, minced
1 cup grated parmesan cheese
1/2 cup chopped parsley
1/2 olive oil
1 tsp salt
1/2 tsp pepper

Mix together the bread crumbs, garlic, cheese, parsley and oil in a small bowl and set aside.

Trim the artichoke and cut off the first inch.  This is what it should look like. 

With your fingers, spread the leaves gently apart. 

Sprinkle salt and pepper over the two artichokes and then take the stuffing and put a small amount between each of the leaves.  Drizzle with a bit more olive oil and place in a pan with a lid.  Put enough water in the pan to go about half way up the artichoke.  Simmer with the lid on for approximately 1 hour to 1 hour 20 minutes.  When the leaves pull out of the artichoke easily, they are cooked. 

Before serving drizzle with a touch more olive oil. 
Enjoy!!!

Love, Beth

Sunday, April 15, 2012

Welcome :)

Hi all,
Welcome to my new blog!!  I've started this because cooking is my passion.  If I could quit my job and devote my life to cooking, that would be my dream.  However, cooking won't pay the bills so I have to continue to cook as a hobby.  My intention with this blog is to publish pictures, recipes and reviews of the food I cook.  I hope that as you read it you will make comments and ask questions.  My hope is to share with you the wonderful world of easy cooking.
Love
Beth
P.S.  The title of my blog is "Beth's kitchen" in Italian, which is my heritage and my cooking style.